Tuesday, June 30, 2009

Patchwork Pincushion


I was browsing the internet for patterns for pincushions. I fell in love with Creative Kismet's Patchwork Pincushion. It turned out to be adorable! It was a great way to use up fabric scraps. The hardest part was the chain stitch around the edge. I had a hard time getting my needle through in places. I'd definitely recommend this tutorial! I did mine with 6 scraps of floral fabric leftover from a quilt and pink felt. Instead of embroidery thread, I used almost like a cord in variegated green. I put a star button on top and bottom to complete the look. I'll definitely be making more of these!


Magazine Coaster


I got really excited when I found How About Orange's tutorial for making coasters out of a magazine. So, I had to try it. I don't know how well it will hold up, but it's cute. You should definitely check it out! If I do it again, I'll try to pick pages that are all the same color or two.


What I've been busy with

Fresh homemade bread. I love the feeling of knowing I made this bread from scratch. It wasn't really as hard as I thought it would be. It makes excellent garlic toast!

I finally finished this latch hook rug. My mother started it years and years ago. Then, she gave it to me to finish. That was probably 5 or so years ago. I finished it this year! Oh, the joys of procrastination...

This is my first attempt at a knitted sock. I may get around to finishing it eventually.


This was my first crocheted afghan. I had a blast doing it. I'm planning on doing another crocheted afghan soon. I'm thinking of doing the ripple afghan. Found at Attic 24.


Sunday, March 19, 2006

Free Pattern--Valentine's Scarf

Valentine's Scarf

Image hosting by TinyPic

Ingredients:
1 Ball Red Worsted Weight Yarn
1 Ball White Worsted Weight Yarn
1 Ball Pink Worsted Weight Yarn
Size 10 Needles
Yarn Needle

Pattern:
Use all 3 strands as one throughout.
Cast on 20 Sts
Knit in Garter Stitch Throughout. (Knit every row.)
Bind off.
Fringe if you like.


Free Pattern--Aaah! Lace Scarf

Aaah! Lace Scarf
NOTE: THERE WAS A TYPO IN THE PATTERN IT HAS NOW BEEN FIXED. IF YOU PRINTED IT OUT PRIOR TO THIS, PLEASE TAKE HEED OF THE CHANGE. IT HAS BEEN MARKED IN RED.


Image hosting by TinyPic

Ingredients:
Approx 4 ounces of worsted weight yarn. I used some Red Heart Super Saver with flecks in it.
Size 10 1/2 Needles (U.S. Size)
Yarn Needle

Pattern:

Cast on 20 Stitches.

Row 1: Knit Across
Row 2: Knit Across
Row 3: Knit Across
Row 4: Knit Across
Row 5: Knit Across
Row 6: Knit Across
Row 7: *yo k2tog* across
Row 8: *yo p2tog* across
Row 9: *yo k2tog* across
Row 10:*yo p2tog* across

Repeat these ten rows until you reach the desired length.


Monday, July 04, 2005

Vacuum Scarf (Free Pattern!)

Vacuum Scarf


Well, this scarf definitely has an interesting name. It all started when my mother went garage saleing and came back with a box of novelty yarn for me.

There was one skein of Bernat Galaxy Nouveau. Now what can you do with one skein of novelty yarn? Make another scarf of course. I grabbed the only pair of knitting needles I had in the car and started swatching. Once back at work with my mom, Dad came in the room. I asked him how he liked my new yarn. He told me that it looked like the stuff you pull out of the bottom of the vacuum when it gets messed up. We all started laughing after that. So, that’s how this scarf has become known as the “Vacuum Scarf.”

Materials

1 skein Bernat Galaxy Nouveau (I used color 53330) Each skein is 50 grams or 1.75 ounces.
1 pair US No. 10 needles

Instructions

Cast on 13 Inches

Knit Every Row until you reach desired length or you run out of yarn.

Bind Off

The great thing about this yarn is that you can’t even tell it’s just plain garter stitch.

Variation: For a stretchy, skinny scarf: Instead of garter stitch work a k1 p1 rib.


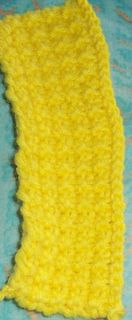
Textured Bookmark (Free Pattern)

Textured Bookmark


Materials:

Small Amount of Worsted Weight Yarn
Size US 6 Needles

Instructions:

Cast on 35 Stitches

Row 1: K Across

Row 2: K1 * yarn in back of work, sl 1 as if to P, K 1, repeat from * across row.

Row 3: K1, *yarn in front of work, sl 1 as if to P k1, repeat from * across row.

Row 4: K across

Repeat these four rows until bookmark is approximately 2 inches wide.

Bind off.


Flower Pin--Free Pattern

Knit Flower (Rose) Pin


Materials:
Size 6 Needles
Worsted Weight Yarn in two colors (Very Small Amount)

Darning Needle

Pin Back (Like a safety pin, but with a flat side)

Flower:

Cast on 6 Stitches

Row 1: Knit into the front and back of each stitch

Row 2: Knit across

Row 3: Knit into the front and back of each stitch

Row 4: Knit across

Row 5: Knit into the front and back of each stitch

Row 6: Knit across

Bind off all stitches.

Shape into rose and seam up.

Leaf:

Cast on 2 stitches

Row 1: K across

Row 2: Knit into the front and back of each stitch

Row 3: Knit into the front and back of first stitch, K2, Knit into the front and back of last stitch.

Row 4: Knit into the front and back of first stitch, K4, Knit into the front and back of last stitch.

Row 5: Knit into the front and back of first stitch, K6, Knit into the front and back of last stitch.

Row 6: K across

Row 7: K across

Row 8: K across

Row 9: K across

Row 10: K across

Row 11: K across

Row 12: K across

Row 13: K across

Row 14: K across

Row 15: K across

Row 16: K2 Tog, K6, K2 Tog

Row 17: K2 Tog, K4, K2 Tog

Row 18: K2 Tog, K2, K2 Tog

Row 19: K2 Tog, K2 Tog

Row 20: K across

Bind off

Using excess yarn and darning needle, sew flower to center of leaf. Weave in loose ends.

Depending on your pin back you can either sew or hot glue it to your flower.


Thursday, April 28, 2005

Cabled and Ribbed Scarf

Cabled and Ribbed Scarf

Materials

1 Pair Size 6 (US) Needles
1 4 Ounce Skein of Yarn
1 Yarn Needle

Instructions

Cast on 35 Stitches

Row 1: K3 P3 K6 P3 K5 P3 K6 P3 K3
Row 2: P3 K3 P6 K3 P5 K3 P6 K3 P3
Row 3: K3 P3 K6 P3 K5 P3 K6 P3 K3
Row 4: P3 K3 P6 K3 P5 K3 P6 K3 P3
Row 5: K3 P3 K6 P3 K5 P3 K6 P3 K3
Row 6: P3 K3 P6 K3 P5 K3 P6 K3 P3
Row 7: K3 P3 K6 P3 K5 P3 K6 P3 K3
Row 8: P3 K3 P6 K3 P5 K3 P6 K3 P3
Row 9: K3 P3, slip next 3 stitches on dpn and hold in front of work, K3 K 3 stitches from dpn P3 K5 P3, slip next 3 stitches on dpn and hold in front of work, K3 K3 stitches from dpn P3 K3
Row 10: P3 K3 P6 K3 P5 K3 P6 K3 P3

Repeat These 10 Rows for Pattern until your scarf reaches the desired length.

Bind Off


Friday, March 18, 2005

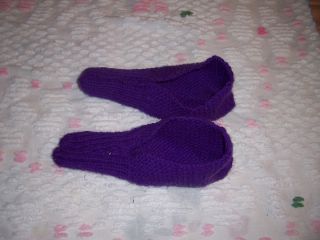
Free Slipper Pattern

Simple Slippers

Note: When I first started knitting, I found this pattern that someone had written up long ago on a type writer. There was no name on it, so I have no idea of the source of this pattern. I did not write it, but I fell in love with this pattern because it perfect for beginners.

1 4 ounce skein of worsted weight yarn (You can make about 2 pairs from one skein)
US Size 7 Knitting Needles
Darning Needle

Gauge: 9 stitches = 2 inches; 6 rows=1 inch

Be sure to check your gauge!

Cast on 31 stitches

Work In Garter Stitch for 5 inches.

After reaching the 5 inch mark, start ribbing.

Ribbing Row 1: K1 * P1, K1; repeat from * to end.
Ribbing Row 2: P1 * K1, P1; repeat from * to end.

Repeat these two rows until piece measures one inch less than length of your foot.

Last row: *K2 tog; repeat form * across row, ending K1.

Finishing: Cut yarn leaving 20 inch tail. Thread yarn needle with the yarn end and pass through the stitches on the knitting needle. Pull stitches up tightly and fasten yarn end securely. Using cast off tail sew up the slipper until you get to the end of the ribbing. Secure end. Using cast on tail sew up heel seam, be sure to leave opening for foot :)

Make 2. If you wish create a pom pom to attach to each slipper at edge of ribbing.